More information on assessment with Remindo
Introduction to blueprints and Guide to blueprint functions
Introduction to Remindo blueprints
In Remindo, a blueprint is where you put the questions for your exams, determine the order in which those questions will be offered, and decide on various settings for your exam (‘Blueprint settings’). You can only use questions that have been ‘approved’ in the item bank. You build a blueprint out of ‘rules’, which are the building blocks of your exam. You place your questions into rules.
By default, every question in a rule will be offered on the exam, but you can change that settings so that each student is offered only one or just a few questions from a rule (3 out of 8, for instance). You can have a different (random) selection for each student or the same selection for the whole group. Blueprints can also be copied.
The ‘Blueprint settings’ are: the number of points, the caesura, and a correction factor for lucky guesses; the exam duration and an introductory text; whether students can see their results immediately after the exam; and prerequisites for the planning and the exam.
Changes to the (approved) questions in your blueprint are automatically applied to exams based on that blueprint. Only ‘active’ blueprints are eligible to be included in the planning and performed. You can test activated blueprints from the student’s perspective.
You can design a blueprint as an exam, a graded practice, or a practice.
- The steps below explain the function of some important buttons on the ‘Tests’ page (a tile you can select when you log in to Remindo). Some useful links to the relevant support pages are included.
-
Step 1
Tests – Overview
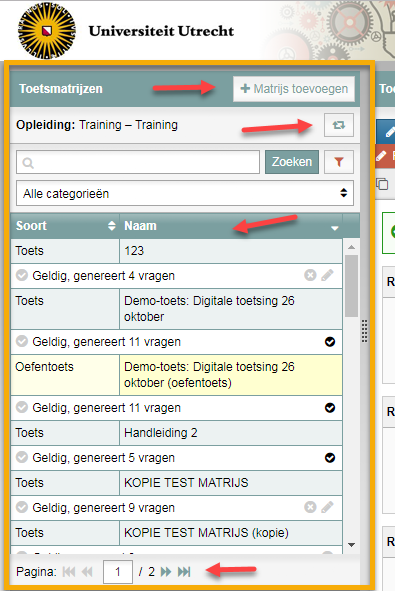
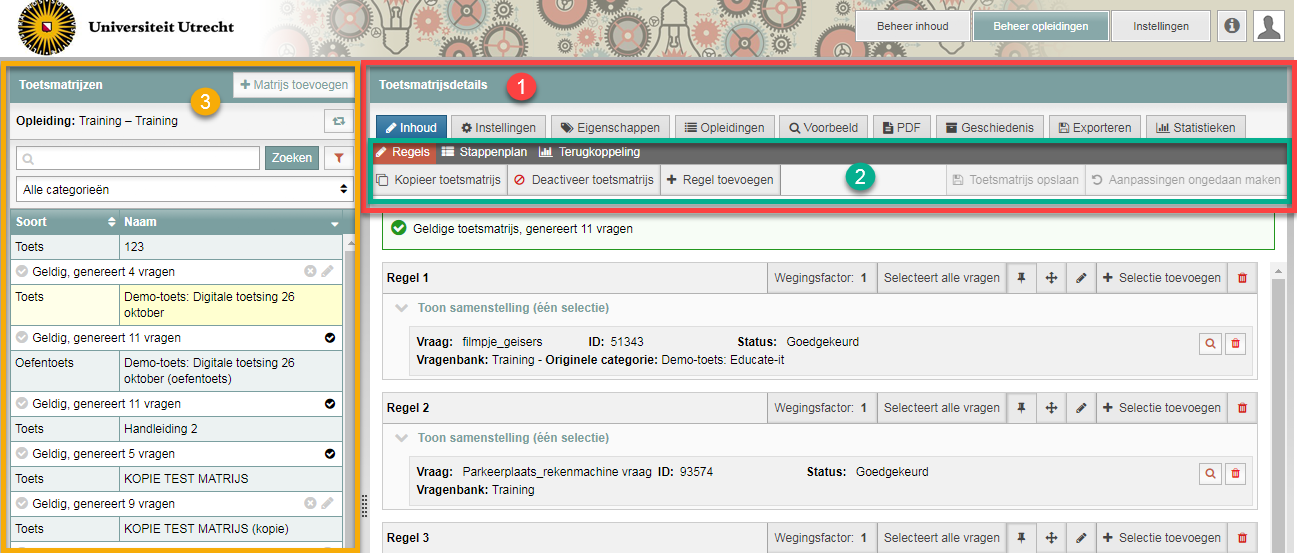
- Log in to admin view, go to ‘Tests’ and select your course. You will see an overview like the one in the screenshot. The following elements are picked out in the screenshot: ‘blueprint details’ (red frame (1)); The ‘Content’ tab in the blueprint details (green frame (2)); and the left column under ‘Blueprints’ (yellow frame (3)).
-
Please note! This page does not contain links to all information about a blueprint. For a complete picture, consult Step 3 on the home page.
-
Step 2
Blueprint details
The screenshot shows the ‘Blueprint details’ field. These details consist of the information, settings and functionality associated with the blueprint. This step will explain the buttons under ‘Blueprint details’. The buttons will be active if you’ve created a blueprint in your course and selected it. You can create a blueprint in ‘Settings’ (see the second bullet point, below).
The buttons under blueprint details:
- Content: Will be covered in detail in the next step.
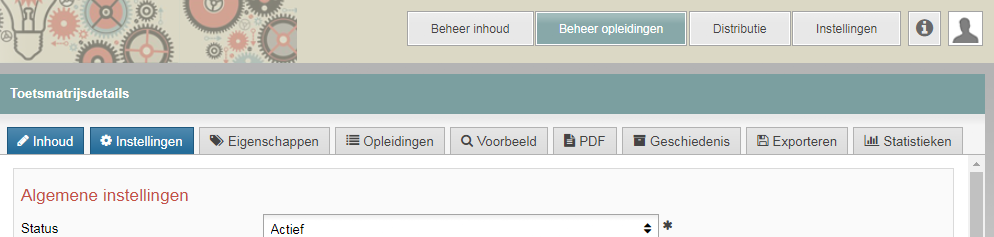
- Settings: These are the blueprint settings. Read about what they all do and how to configure them here. Some settings have entire pages devoted to them!
- Properties: The creators of this support site are not aware of any current applications of this functionality at UU. You could, of course, ask your key user for advice.
- Courses: Here, you will find the courses associated with the blueprint.
- Preview: This tab lists all of the questions in your exam. The order (random/preset) and selection (if you’re not presenting all of the available questions) of the list will be just as your students would see it. ‘Preview’ will also show you the points total and the effect of the ‘Negate guessing‘ function at the top of the page. Additionally, you can create versions of exams here if you are using a source blueprint.
- PDF: This page will tell you how to turn your exam into a PDF file, and explain your various options concerning the contents.
- History: This will show you the complete history of all changes made to your blueprint.
- Export: This allows you to export exam date in a few different ways.
- Statistics: Step 3 on this page explains how to calculate Cronbach’s Alpha (a measure of your exam’s reliability) in admin view.
-
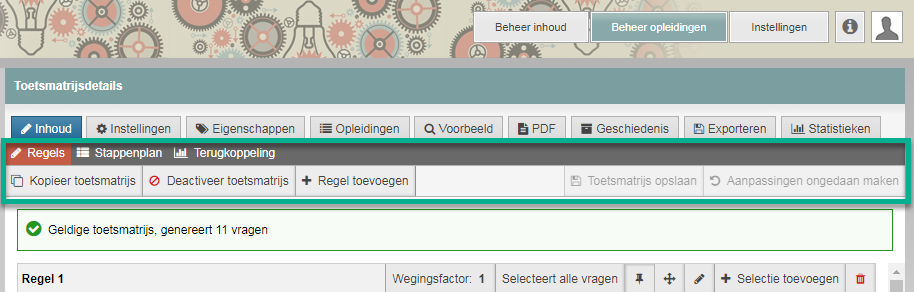
Step 3
- Roadmap: You can use a roadmap to make your students complete one section of the exam before they can start the next or make them choose from two (or more) exam sections full of questions to answer.
- Feedback: You can use this function to see separate scores for specific subsections of the exam (not to be confused with the ‘exam sections’ of a roadmap). You could, for instance, consider Spelling and Grammar (an example of question properties) on a language exam separately or look only at the scores on multiple-choice questions in an exam that also includes open questions.
-
Step 4
The ‘Blueprints’ field
On the left-hand side of the overview page under ‘Tests’ (see screenshot), you will see the ‘Blueprints’ field. Below is a description of the parts of that field marked with red arrows in the screenshot:
- The ‘+ Add blueprint’ button allows you to create a blueprint. The information on this page will help you decide what kind of blueprint you need.
- The button with the two green arrows chasing each other lets you choose a course. You can also use the search bar to look for a blueprint.
- The list of blueprints contains all kinds of information, such as the blueprint ‘Type’, its ‘Name’, but also whether the blueprint is valid, whether it’s active or inactive and whether it has been saved (see step 5 on that page) after editing.
- At the bottom of the list, you can navigate around more pages of blueprints.