
Test blueprints
Blueprint: Add roadmap
Write a roadmap for your exam when you want to, for instance:
- have students complete one section of a question before they can start the next one, then prevent them from returning to earlier sections.
- have students choose which sections of a question they answer, only letting them answer two out of three sections, for example.
What follows is an explanation of how to create a roadmap.
Please note! When you add a roadmap to an existing blueprint already containing questions, all of those questions are automatically added to the first section of the first stage in the roadmap.
Please note! Once you add a roadmap to a blueprint, it cannot be taken out again. If you decide you want to stop using a roadmap, you will need to create a new blueprint.
Steps 1-15 explain how to create a road map. Please first read the tips below.
Adding a ‘road map’ to a new or existing blueprint
A road map is divided into ‘Stages’, and within those into ‘Sections’. A road map can be added to an existing blueprint with questions or to a new blueprint. Please first read the tips below.
Tip 1: After adding a road map to a new or existing blueprint, you cannot remove it from the blueprint. If you don’t want to work with the road map anymore, you will have to create a new blueprint.
Tip 2: When adding a road map to an existing blueprint with questions, all questions will automatically be assigned to the first stage of the road map.
Do you want to retain the existing blueprint without a road map? First make a copy of your blueprint and name it. Afterwards, go back to the blueprint you want to add a road map to and go to step 1 on this page.
Tip 3: the questions already in your blueprint will be added to the first stage of your road map. You will not be able to move those questions to a different stage in the road map. If you, for example, have 30 questions in an existing blueprint, and you decide to add a road map to it, those 30 questions will be automatically added to the first stage of the road map. In such as case, it might be more practical to work with an empty blueprint (without Rules and questions), first add the road map, and then add the questions once the structure of the road map is set. This will also be the principle that we follow on this page.
-
Step 1
- Add a new blueprint but refrain from filling it with rules or questions.
- After you configure the settings for a new blueprint (that does not yet contain lines with questions), click Roadmap.

-
Step 2
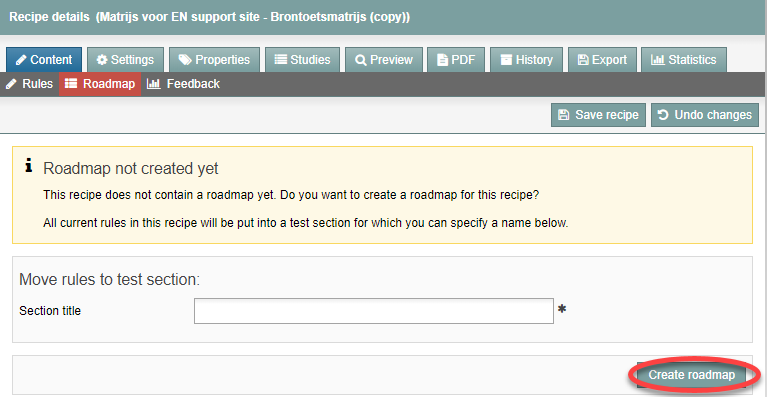
- The following screen will open:
- Fill in a title for the first stage.
- Then, click on ‘Create road map’.
-
It might be the case that you already have a rule in your blueprint. In that case …
- When you click on ‘Roadmap’, the information below will appear (see screenshot):
- Enter a title for the first test section.
- Then click on ‘Create roadmap’. A section will immediately be visible in the step.
- Continue at Step 5.
-
Step 3
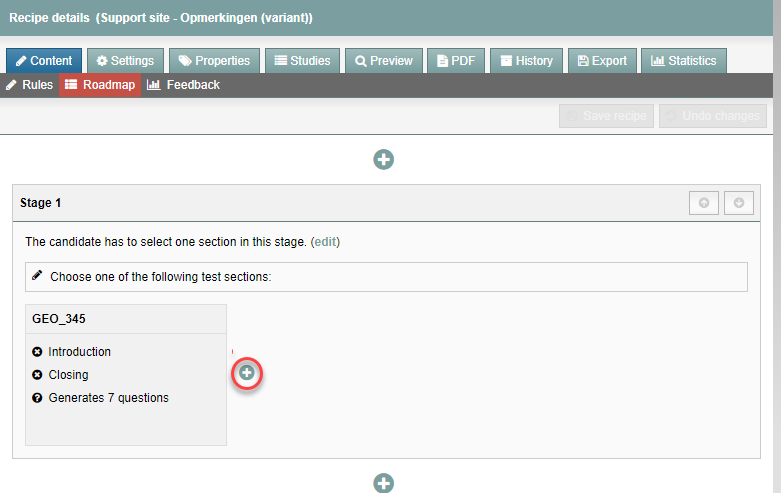
- You will see the following screen:
- The first stage has been created.
- Click the small Plus sign (see red circle) to add a Section.
-
Step 4
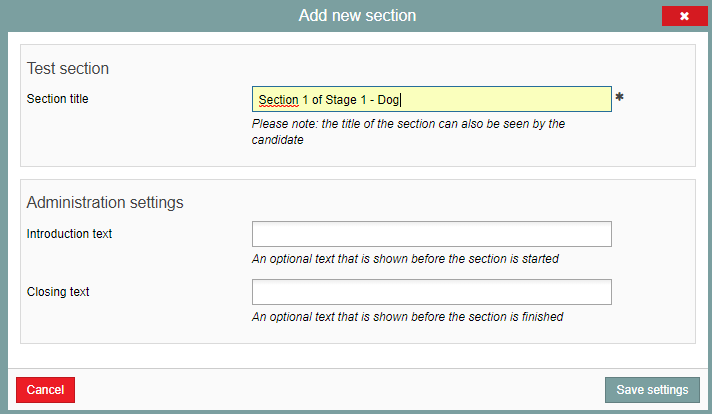
- The following screen will open:
- In this screen, you will assign the exam section a name and, if appropriate, add introductory and closing remarks to the Section.
- Click Save settings.
-
Step 5
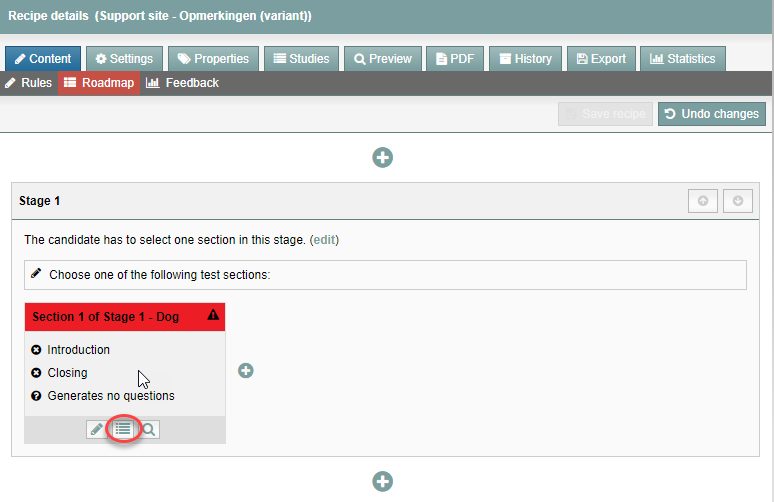
- The first Section has now been created.
- If you hover over the Section with your mouse cursor, three icons will appear.
- Click the Pencil to modify the Section’s name and introductory and/or closing remarks.
- Click the List to open the screen for adding questions to the Section.
- Click the Magnifier to see an example of questions in this section.
-
Step 6
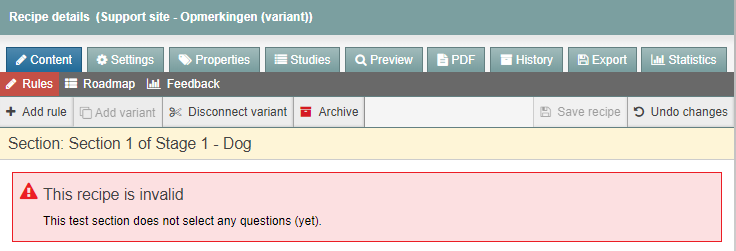
- Click the List icon to add questions to the Section.
- You will see a new screen.
-
Step 7
- Add questions the same way you would for a blueprint without a roadmap. Put your questions into Rules.
- When you are done adding questions, click Roadmap in the overview.
-
Step 8
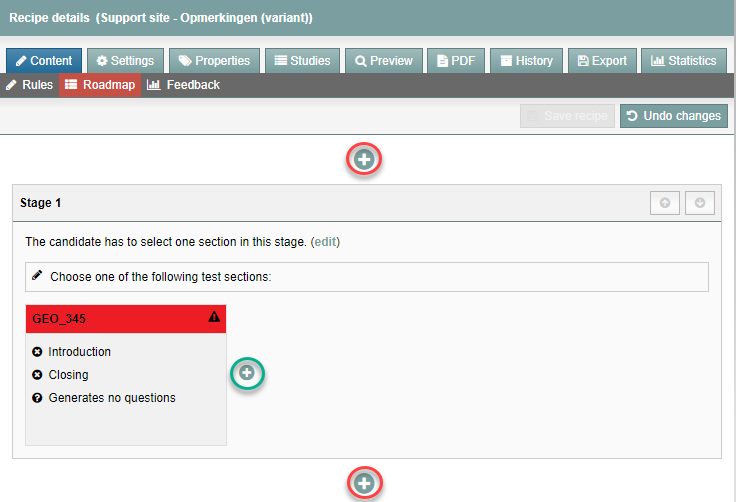
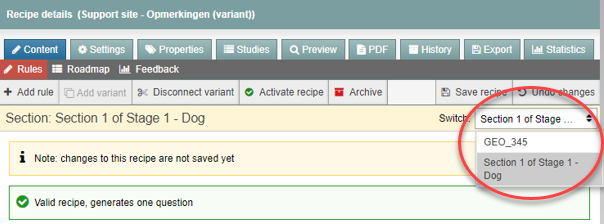
- Here is what you will see:
- ‘Section 1 of Stage 1 – Dog’ is coloured green. This means there are questions in this Section. (Generates 5 questions.)
- You can save the Roadmap on a regular basis by clicking on ‘Save blueprint’.
- Add a new Stage by clicking either of the two Plus signs above or below Stage 1 (see red circles).
- Add a new Section by clicking the Plus sign to the right of the first Section in Stage 1 (see green circle).
-
Step 9
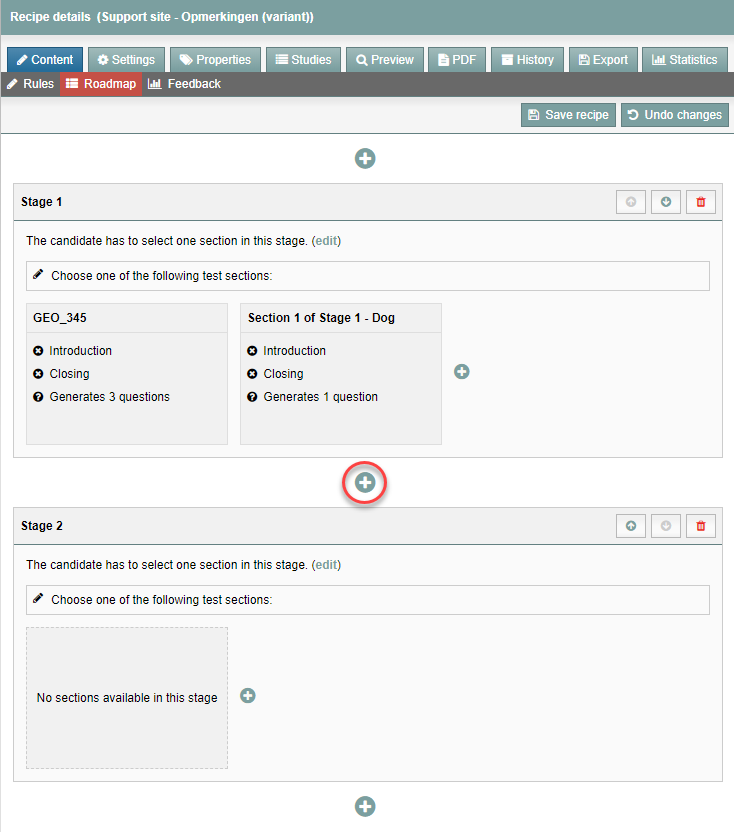
In this example, a new Section and a new Stage have been added.
-
- Move Stages up or down one spot by clicking the (white) arrows in the top right of the Stage.
- Remove Stages with the Red trashcan next to the white arrows in the Stage.
-
Step 10
- Add questions to this second Section by either hovering over the Section and clicking the List icon or by clicking Rules at the top of the screen.
- In the screen for adding questions, select the Section you want to add questions to with the drop-down menu (see image).
-
Step 11
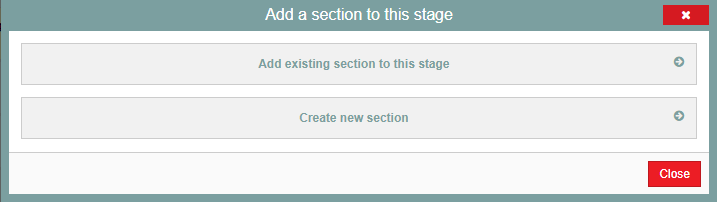
- When you add a new Section to the second Stage, you will have a choice of whether to add an existing Section to this Stage or to add a new Section to the Stage.
- If you choose Add existing section to this stage, you will see a screen that presents all existing Sections as options. Choose the Section you want. This Section will be added to the Stage.
-
Please note! Students can only perform any given Section of the exam once, even if that Section appears on the exam multiple times.
-
Step 12
Roadmap settings
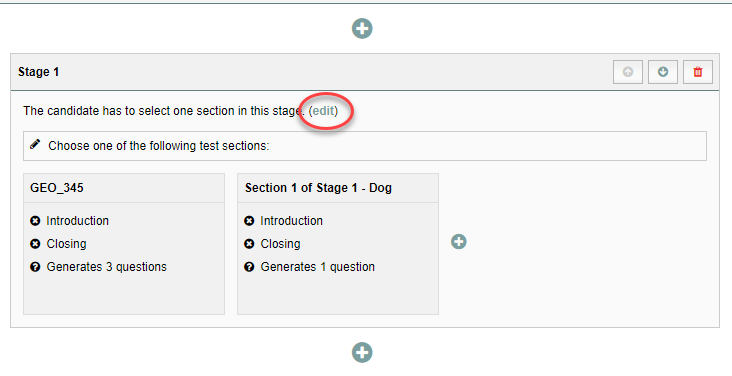
- When you have created all of your Stages and Sections, you must decide how many Sections in each Stage your students will have to complete.
- Click the Stage for which you want to configure the number of Sections. Click edit next to the text ‘The candidate has to select one section in this stage.’
-
Step 13
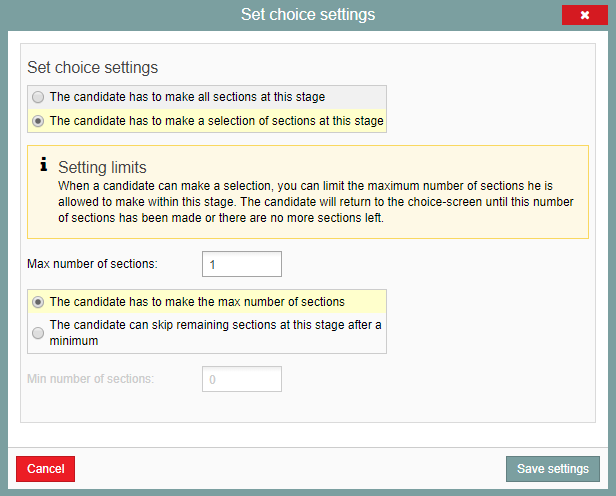
- A new screen will open. In it, configure how many Sections the student must complete in this Stage.
- Click Save settings after you have made your choice.
-
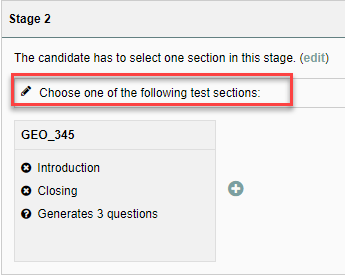
Step 14
- Click the pencil icon in a Stage (see red rectangle in following image) to modify the Stage’s introductory text. One of the things you should indicate here is how many Sections the student has to complete out of a total of how many.
-
Step 15
- Click Save in the top right when you are done creating your roadmap.
