Test blueprints
Blueprint: building on a blueprint with questions selected in ‘Questions’
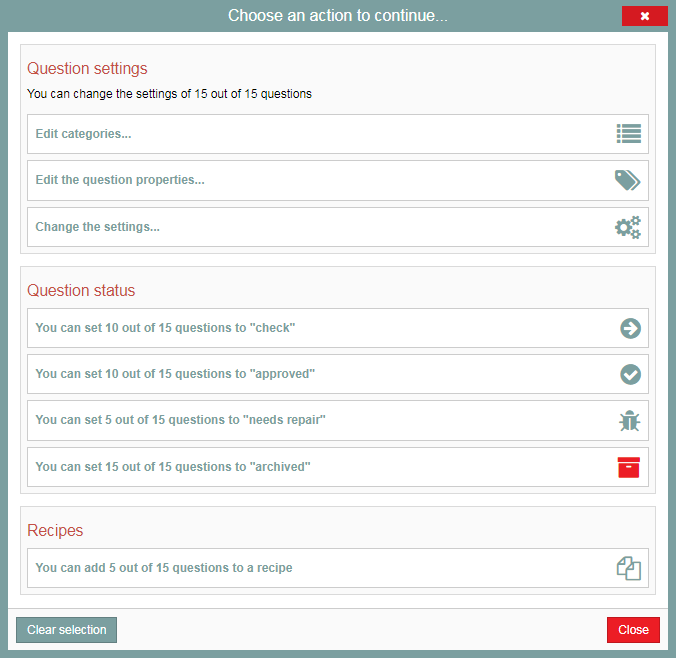
Having selected questions in Questions, you can view the actions you can perform on that selection by clicking the lightning bolt icon in the yellow area on the left side of the screen in the item bank.
The full list of available actions looks like this:
The steps that follow explain the ‘Add questions to a blueprint’ action (under the Blueprint header).
- Click this option. A pop-up window will open (see screenshot in Step 1).
-
Step 1
Blueprints
A blueprint in Remindo is where you put questions that should be included in exams as well as the settings for those exams. A blueprint can only include questions that are marked ‘Approved‘ in the item bank.
Questions in your selection that are marked ‘Approved’ can be added to either an entirely new blueprint (plus icon in the screenshot) or an existing blueprint you or a colleague built earlier (pen icon).
- This page addresses the latter option. Click the pen icon.

-
Step 2
- From the list that appears, select the course where the blueprint is stored.
- From the list that appears, select the blueprint to which you want to add the question or questions in your selection.
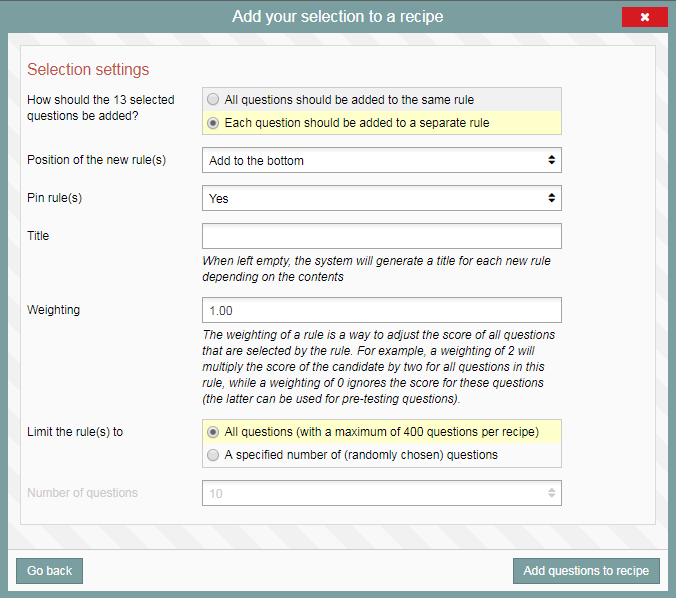
- The following page of ‘Selection settings’ will appear.
The ‘Selection settings’ determine how the selected questions will be added to one or more new blueprint rules. They also determine some of the options within those rules. This is what the ‘Selection settings’ mean:
- Select whether the selected questions should all be added to a single rule or whether a new rule should be created for each question. When you add multiple questions to a single Rule, these questions will be shuffled around within that Rule. If you want your questions to appear on the exam in a set order, put each question into its own Rule.
- Stage: This option will only appear if you created a ‘Roadmap‘ consisting of multiple stages. Select the stage to which the new rule or rules should be added.
- Position of the new rule(s): This is where you decide whether the new rules should appear above or below the existing blueprint rules.
- Pin rule(s): Select ‘Yes’ if you want the rules to remain in the same place and be displayed in that set order during the performance of the exam. Even then, questions within a rule will still be shuffled.
- Title: This is where you assign a name to the new rule or rules. Please note that if you create multiple rules, they will all be assigned the same name.
- Weighting: This option determines how questions will be weighted. The default weight of all questions is 1.
- Limit the rule(s) to: Use this option when you have multiple questions in a rule. When you click ‘A specified number of (randomly selected) questions’, a set number of questions will be randomly picked from those available and included in each exam. Please note that each student will face a different selection of questions!
After you have configured all of these settings, click ‘Add questions to blueprint’.
-
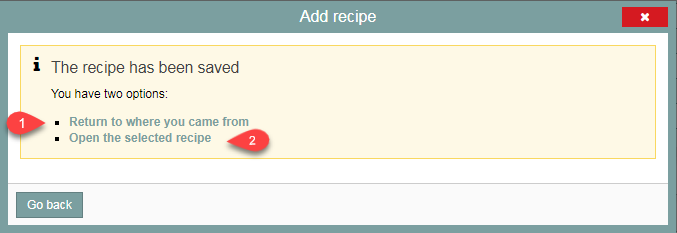
Step 3
- Next, choose whether you want to return to the page of actions for selected questions (1) or continue to the blueprint you just created (2).