
Assessment and checking answers
Answer key: Editing the closed question answer key
Closed questions are corrected and scored automatically in Remindo. It may be necessary for any number of reasons to make alterations to the answer keys for closed questions after the exam has already been performed.
Effects of editing the answer keys
Remindo allows you to make alterations (1) for individual students, (2) for all students in the same test moment, or (3) for all students who took the same test. Remindo supports the following options:
- Change correct/incorrect answers: Change for each distractor whether it is considered correct or incorrect and how many (bonus) points it is worth
- Accept any answer: This makes the question largely irrelevant. The maximum number of points for the question will be awarded to all students, but the question will not be removed from the exam.
- Retract question: The question will be retracted, no points will be awarded for it and the final score will be calculated based on the items that remain.
With this action, alterations are only made to the answer key and, with that, to the results of the students who took the test. The alterations only effect the questions in the item bank in Remindo’s admin view when chosen actively. Our advice is to first read the support page on how to edit the answer key in admin view. Below that information, you can find a link to the method to edit in admin view.
Alterations made in the question in admin view are not applied to already answered questions in previous tests.
Part 1: Editing closed question answer key – explanation of method
The steps that follow explain how to edit the closed questions answer key. The example assumes that the questions are multiple choice with one or more correct answers, but it is possible to change the answer key for other types of closed questions as well. For more information, please have a look at the following document: Editing answer key after exam performance
The explanation of editing the answer keys for graphic questions follows in Part 2 of this support page.
-
Step 1
- Log in to student view.
- Navigate to the students’ results.
- Click Result details behind the name of a student for whom you want to make a change.

-
Please note! The procedure for changing questions for all students or just a single student are the same. You have to access a single student’s results first. Then you indicate whether the change you enter should be applied only to this student or to all students who have performed this exam.
-
Step 2
- You will see the exam the student performed.
-
Step 3
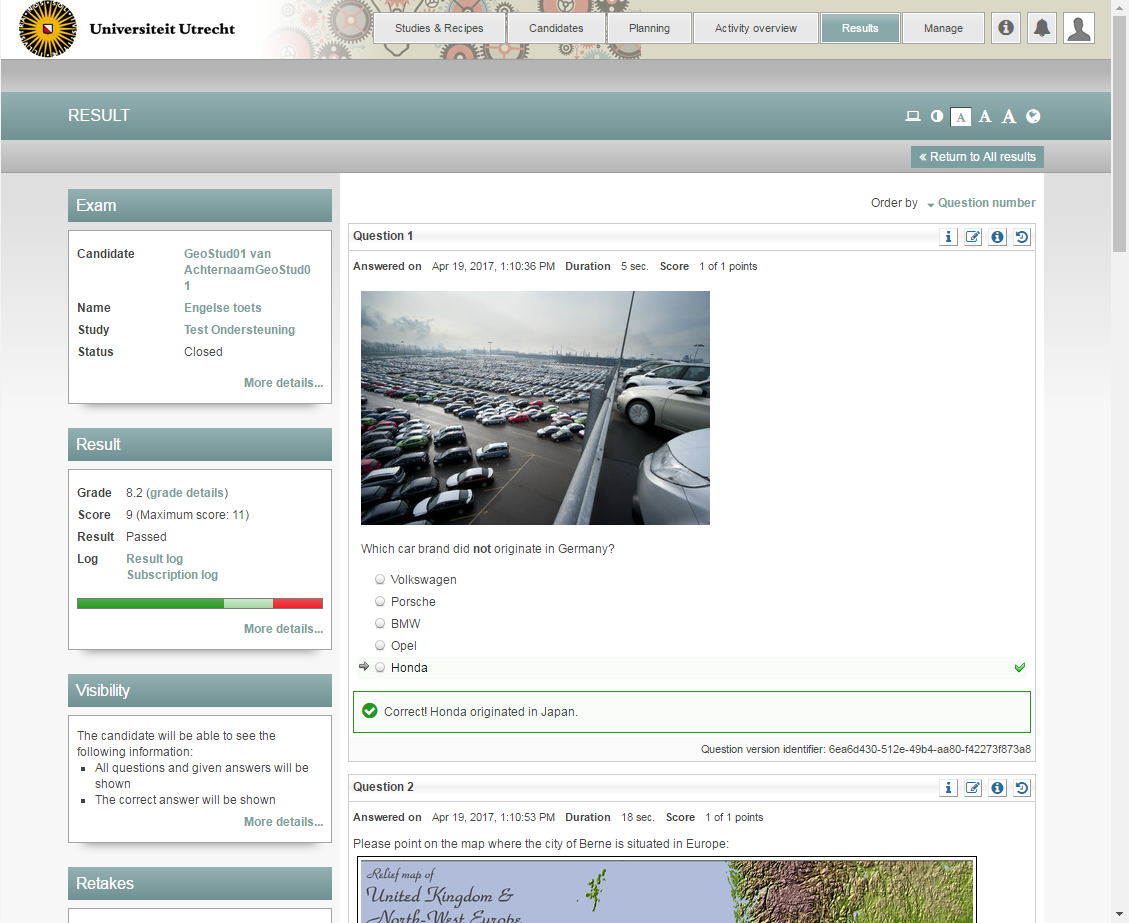
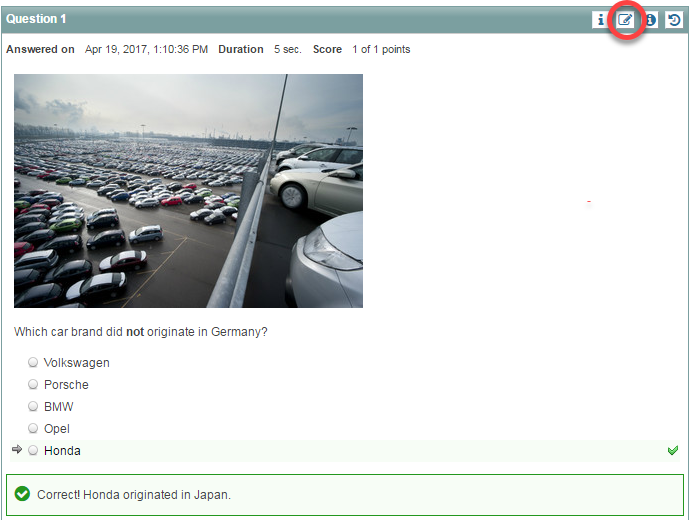
- Scroll down to the question you want to change.
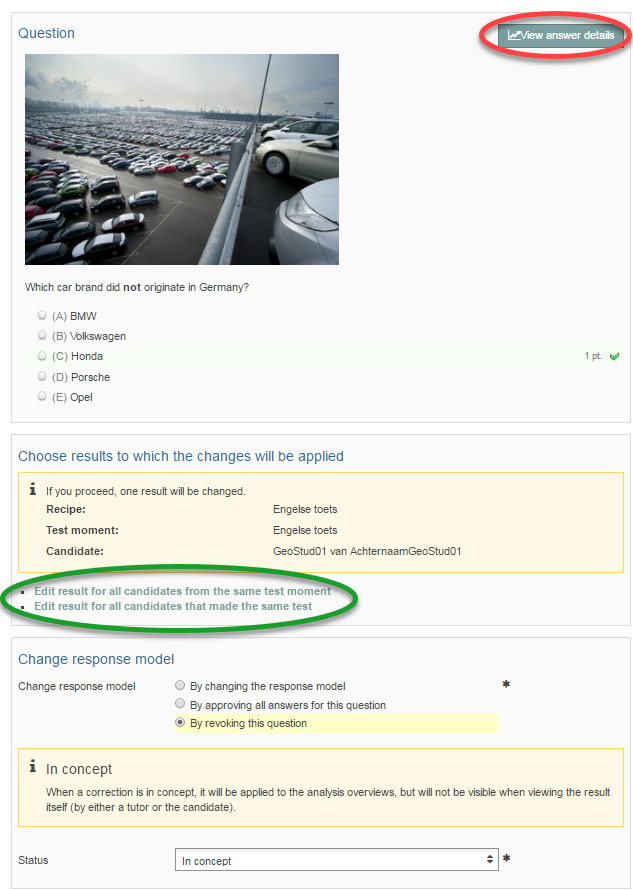
- Click the Change answer icon in the top right corner of the question (see image).
-
Step 4
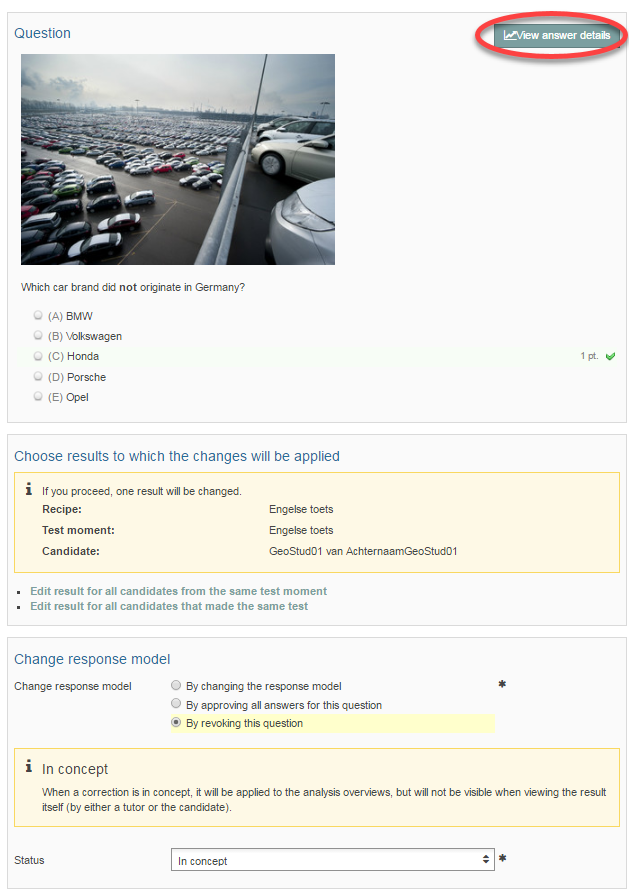
- You’ll arrive at the screen for changing the question’s answer key.
- Click View answer details to see how all students answered the question.
-
Step 5
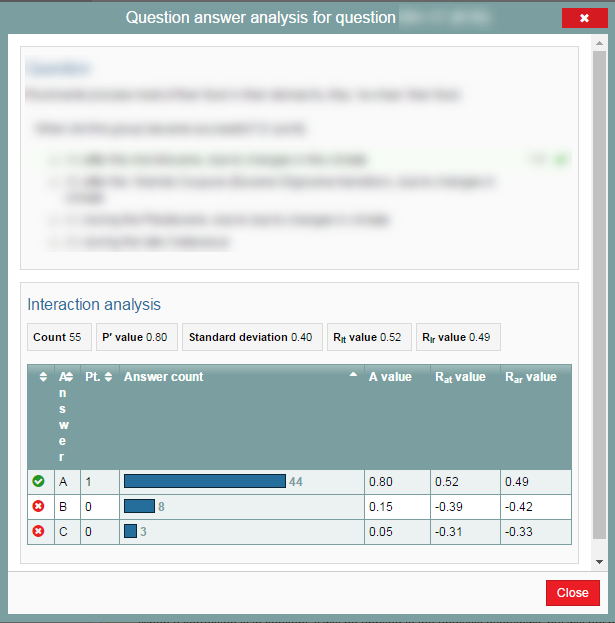
- For a single question, this image shows what number of students selected each of the distractors.
- Click on the blue bar to see the names of all the students who selected that distractor.
- A few analytics are shown on top of the image.
- Click Close when you’re done reviewing what each student answered in View answer details.
-
Step 6
- That will return you to the screen for changing answers.
- Click (in the green circle) either Change the result for all candidates within the same test moment or Change the result for all students who performed the same exam (blueprint) to indicate which group of students the change should be applied to.
-
Step 7
- Indicate how you want to change the answer key. Select one of these three options:
- By changing the response model: This allows you to change for each distractor whether it is considered correct or incorrect and how many (bonus) points it is worth;
- By accepting any answer to this question: This makes the question largely irrelevant. The maximum number of points for the question will be awarded to all students, but the question will not be removed from the exam;
- Retract the question: As above, except the question will be retracted, no points will be awarded for it and the final score will be calculated based on the items that remain.
-
Please note! When editing the answer key after exam performance, once can choose per question to allow for negate guessing to change with the edited question. Editing the answer key after exam performance in combination with the feature to allow for negate guessing to change with the edited question, can results in various effects on the students’ end results. Therefore, ask your key user to watch along while editing the answer key. You could also edit the answer key and have your key user run a check for you, or you could als your key user to edit the answer key for you.
-
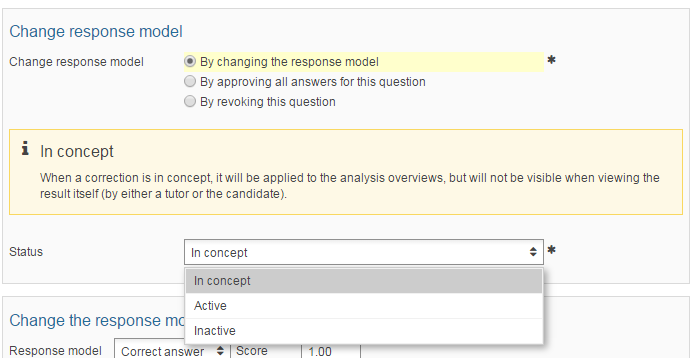
Step 8
- In the Status drop-down menu, indicate how your change should be applied. There are three options;
- In concept: The change will only be applied to analytical overview, but will not be visible in the results. Students cannot see draft changes.
- Active: The changed result is visible to anyone authorised to view results.
- Inactive: The changes will not be visible anywhere, but can be activated at a later time.
-
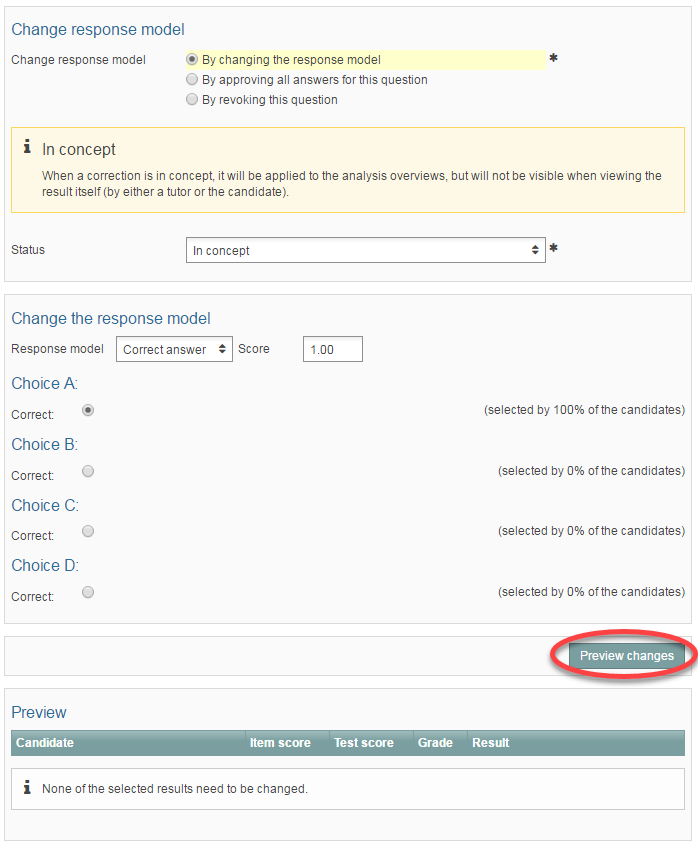
Step 9
- When you select any of the options above, you will immediately see what effect the change will have on the students’ grades at the bottom of the screen under Example. (If you selected By changing the response model, you also need to click on View changes to see the effect of the changes.)
Example:
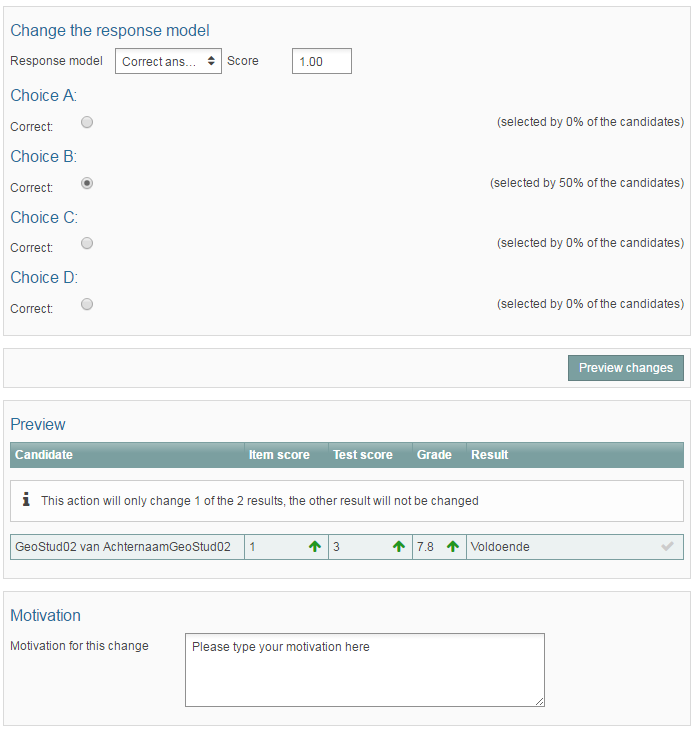
- In the example shown here, the choice was made to Change the response model.
- Click View changes.
- You will see under the Example heading that this change affects one student.
- You will see small red or green arrows behind the students’ names. A green arrow means the student’s score went up, and a red arrow shows it went down. In the example, the score of one student improved.
-
Step 10
- When you’re sure you want to apply the change, all that remains is to describe your reason for the change in the Motivation text box. Afterwards, click Save.
- The change will now be applied (determined by the status you selected: Active, Inactive or In concept).
-
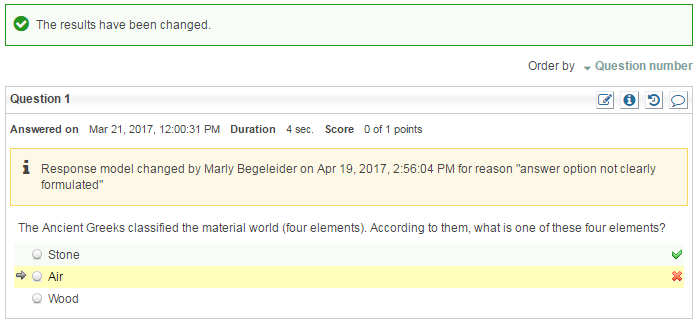
Step 11
- You will be returned to the screen with the student’s results and shown a notification stating that The results have been changed. The question now contains a separate notification indicating that the answer key for this question has been changed.
-
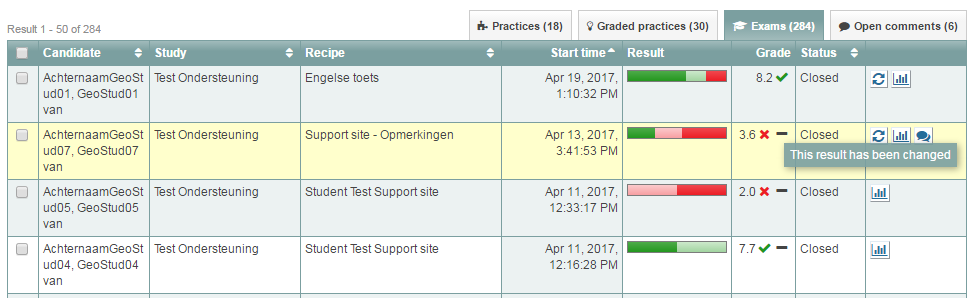
Step 12
- In the overview of all students’ results, a black dash will appear behind students’ grades to indicate that the student’s result has been changed.
-
Step 13
Part 2: Editing the graphic question answer keys
In Remindo, it is possible to edit the answer key for graphic questions as well. If you have not made alterations to the answer key for closed questions in admin view before, please have a look at Part 1 of this support page, so you understand the basis and have knowledge of the steps (settings) that need to be followed.
After that, continue below.
When you know how to edit the answer key for a multiple-choice question (as above), you can fairly easily apply this to other types of questions, such as graphic questions. Many fields that need to be filled in are the same for different question types. These fields have been left out in the explanations below.
-
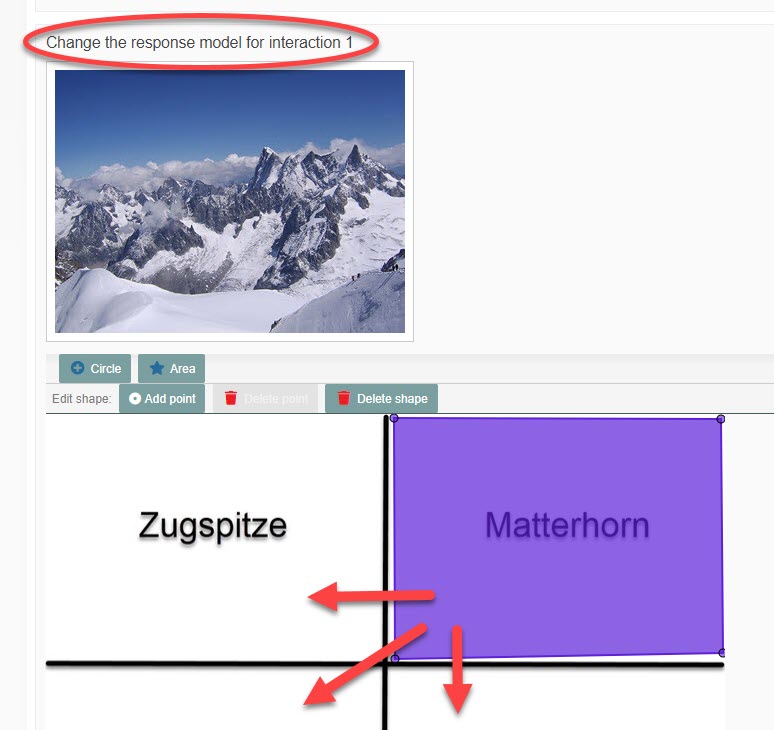
Step 14
In case of a drag & drop question, I specifically edit…
- In case of a drag & drop question, you change the answer key for various interactions. The hotspot area, that belongs to the interaction, is placed in the correct spot.
- In the screenshot below, one interaction for which you can move the hotspot area (in the direction of one of the red arrows) is shown. When the hotspot area is moved to ‘Zugspitze’, the hotspot area that is now on ‘Zugspitse’ also needs to be moved. The interactions are shown further down this page. How the hotspot areas are edited exactly, can be different per question, because every question is graphically designed in a different way.
- The points and bonus points can be edited.
- Click ‘Save’ when the made alterations are satisfactory.
-
Step 15
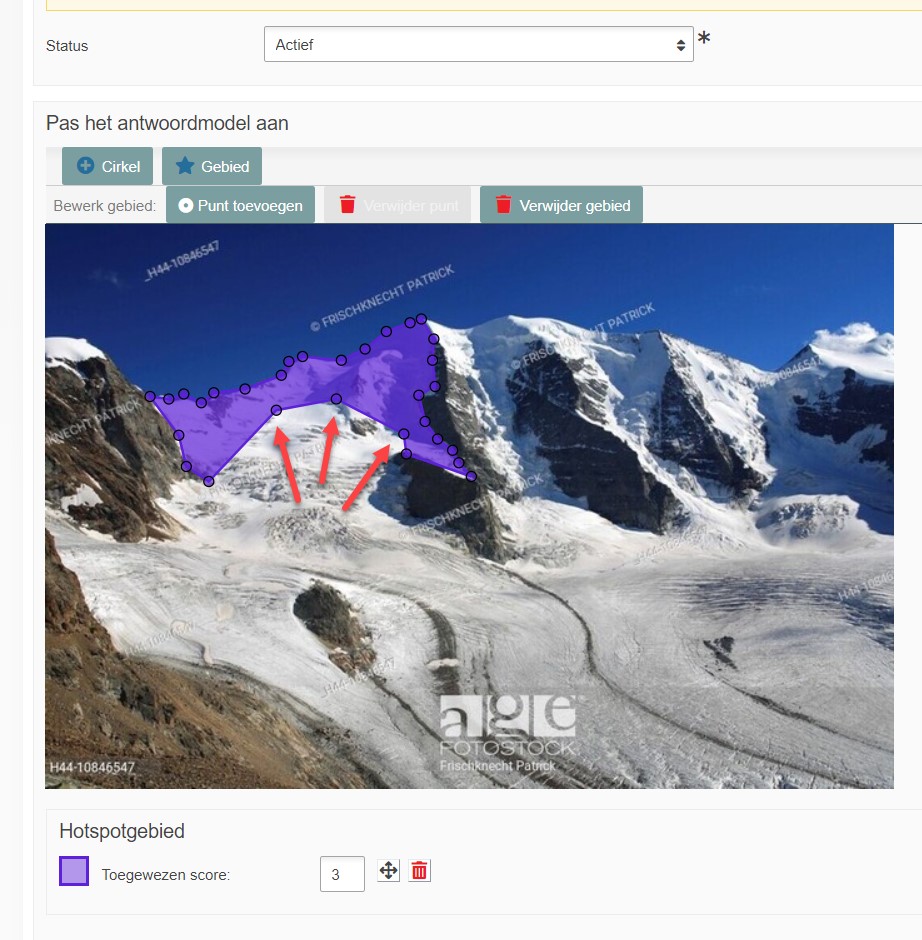
In case of a hotspot question, I specifically edit…
- In case of a hotspot question, the hotspot area is edited.
- Click the hotspot area and change the position of the dots that make up the hotspot area (see screenshot).
- The allowed score can be altered.
- Click ‘Save’ when the made alteration is satisfactory.
-
Step 16
In case of a graphic associate question, I specifically edit…
We are currently working on a short advice on how editing of this specific question type works.
-
Step 17
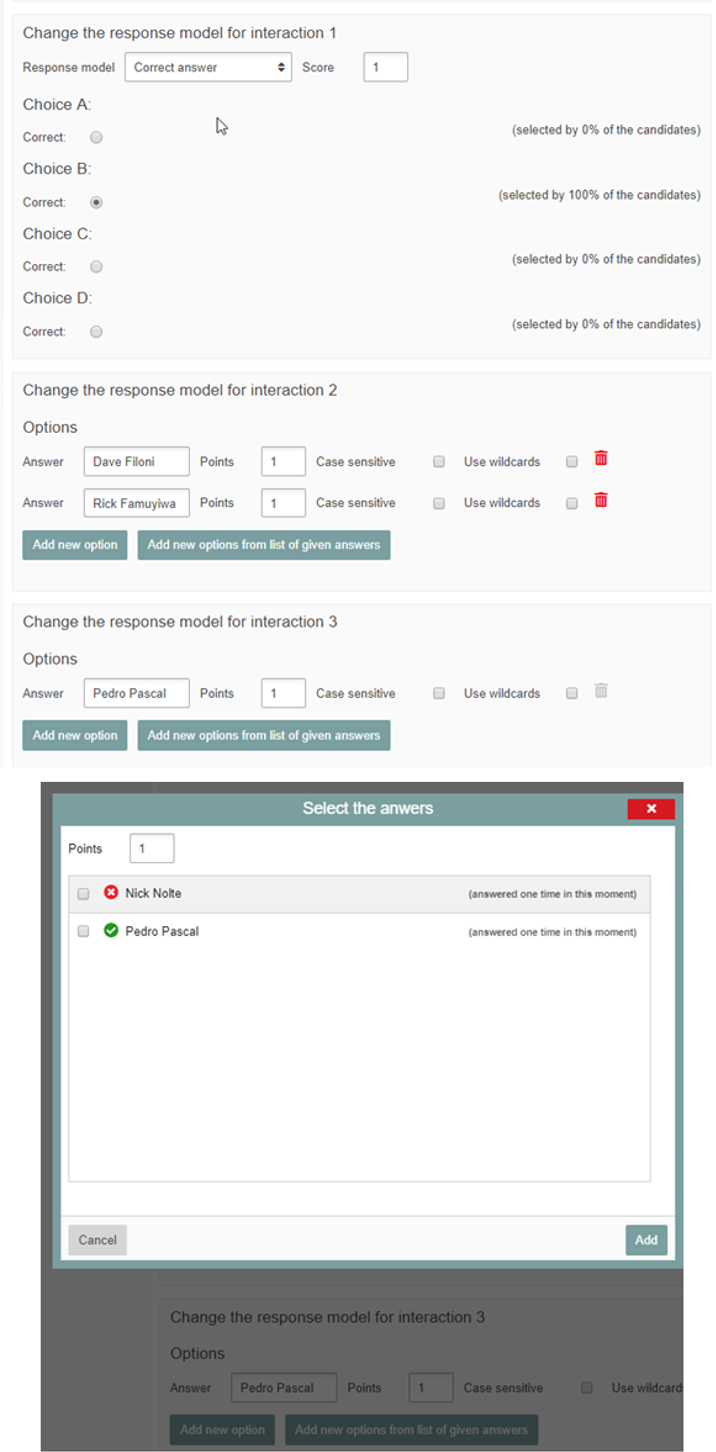
(In bulk) Editing answer options of a text entry question
It can happen that a student’s answer is inaccurate according to the answer key but can be regarded as correct on further consideration. The answer key of a text entry question can be edited in bulk. From the detail results of an individual student, a new answer option can be added to the correction of a specific question, manually or on the basis of the answer provided by the student.
Within a question of choice, go to ‘Change answer’, as explained in Step 3 on this page. In ‘Change answer key for interaction {number}’, adjustments can be carried out per interaction. In a text entry question interaction, ‘Correct answer’ and ‘Scores’ can be used interchangeably. In case of a text entry question interaction, new answer options can be added via ‘Add new option’ and/or via the function to add a new option from a list with given answers. Scores can be adjusted there as well.
-
The alteration needs to be saved and activated after the new option has been added or selected, to carry out the adjustment. After the alteration has been saved, a notification appears on top of the page about editing the answer key of the question with ‘concept’ as a status. When you activate the question alteration, it pulls through and the status changes to active.
Note: The newly added option is visible in the learning analytics of the test and in the tab ‘Details of the result’, but not on the page for editing the answer key. It is also not available as an answer option for the question in admin view.
