Manuals
Instruction for teachers for digital assessment on location
Please read this instruction thoroughly for a good preparation before the assessment.
Attention: This document refers to assessments taking place in an exam room at the Utrecht Science Park, for which Chromebooks are used and where e-assistants are there to help with technical issues. It also contains information on what to do in case of a malfunction at the USP. Ignore this information in case of assessing from home (i.e. because of Covid-19 measures).
Tip! It is useful to additionally read the ‘Studentinstruction Remindo Home’. This will provide more insight into what the student sees or does when starting and taking the test.
Attention! Internet Explorer is no longer supported (by Microsoft). We therefore strongly advise against using Internet Explorer for general use.
Attention! If you want to print this page, images from the yellow information sections will not be included in the print. We advise you to use this document for printing the information, including images, from the yellow sections.
Attention! If no e-assistant is present 20 minutes before the start of the digital assessment with Chromebooks, please call 030-2532836. We advise you to save this number on your phone, so that you don’t have to look it up during a test.
General affairs
- Approving: The teacher has to digitally give the students permission before they can start their exam (term in Remindo: approve). You will find instructions on how to do so in Step 1.
Attention! When this is the setting, digital permission can be given half an hour before the actual start of the test moment. How to do this is explained in both methods mentioned below. The student first has to request for approval for that test. - Test and student are visible when… Tests are visible in the Activity overview (menu in upper bar in test taking environment) on the day(s) that students can take the test. Students are visible in the overview of the test in question when they have clicked on ‘Start exam’.
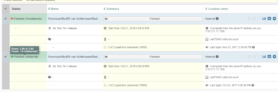
- Security: After students have started a test you’ll be able to see in the Activity overview which students are supposed to work on which Chromebook (all Chromebooks have a sticker with a number and letter). When, for example, you see that [First name, Last name] has logged in on Chromebook X13 (see red square), but there is someone else working on that laptop, you will know that something is not right. Below you can see the difference between students who are logged in on a Chromebook, and students who are logged in on a different device (the ip-address is visible).

- Identity check: Remindo does not check the digital identity (Solis-ID log-in) against the person using the Chromebook when a student logs into Remindo. It therefore remains necessary to check the identity of the student when assessing digitally using Remindo.
- Incidents: E-assistants will be present during the exam. They will set up the Chromebooks and clear everything again after the exam. During the exam they will be available to solve technical issues with the Chromebooks/Remindo test, if they may occur. In case the e-assistant are unable to solve the issue themselves, they will follow the emergency plan.
E-assistant will not take over the responsibilities of the teacher or teacher-/student-assistant.
Note: Ideally the e-assistant will start setting up the Chromebooks in the exam room an hour before the start of the exam. In some cases there is less time for e-assistants to set everything up, because of a written exam taking place in the exam room right before the digital exam. In that case the e-assistant will start setting up as soon as they can. If no e-assistant is present 20 minutes before the start of the digital assessment with Chromebooks, please call 030-2532836.
- Role of the teacher in case of a malfunction with large impact: When a network malfunction, Wifi-failure or power outage is unsolvable by Business Information Management or the Network department for more than 20 minutes after reporting it (through the Servicedesk, by the e-assistants), the e-assistant will inform the examiner. The examiner will decide and inform the chief invigilator that the test will be cancelled. Students will be offered a digital re-test as soon as possible.
- Adding missing student to the test moment: you can, as a teacher, still add students to a test moment when they have not already been registered to the test moment in Remindo. You will read how to do so in step 9. When a student cannot start the test because it has the status ‘inactive’, adding the student to the test will not help.
-
Proctor Key
When a student’s exam or review moment is aborted early (for example in case of a Chromebook that is shut off or accidentally clicking on ‘Exit’ in the navigation bar). After the student logs into Remindo again on the Chromebook, to resume their exam or review moment, a Schoolyear screen will appear in which the proctor key is asked. This code can be retrieved via the Schoolyear Proctor Dashboard.
The Proctor Key will be asked when during an exam or review moment the:
- Chromebook is shut off due to technical issues (e.g. empty battery)
- student shuts off the Chromebook with the power button
- student interrupts the exam by clicking on the ‘Exit’ button in the Schoolyear navigation bar, instead of closing the exam in Remindo itself
When a Proctor Key is asked:
- Open the exam in question in the activity overview in Remindo
- Click on the ‘Schoolyear Proctor Dashboard (or Schoolyear Surveillanten Dashboard) in the top of the screen.
The Schoolyear log in screen appears.
- Log in with your SolisID
- The Schoolyear Dashboard, belonging to the exam/review moment in question, is opened.
- Click on the button ‘Proctor code’ in the top right corner to retrieve the 4-digit code.
This code is active during the entire duration of the exam and is the same for every student. - Share the code with the student or enter it yourself on the Chromebook in question.
After entering the proctor code, the student will have to ask for permission to resume their exam (if this setting is on for this exam).
-
Step 1
Logging into Remindo
You have to log into a device in order to give students digital permission. You can use our own device, or use a Chromebook that is available in the exam room.
Logging in with your own device
Log in at remindo.uu.nl with your solis-id and password.
Logging in with a Chromebook
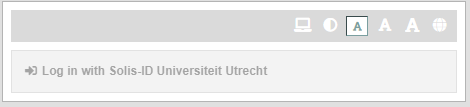
- After the Chromebook has been started up you will find yourself in the KioskApp. Click on the tile ‘University Utrecht’.
- Now you can log into Remindo using your solis-id and password.
-
Step 2
Two ways of approving students
Below the yellow information section you will find two methods for approving students. They correspond to particular settings of the test moment in the planning of Remindo:
- Step 3 and 4: Method 1
- Step 5 to 7: Method 2
Your key-user knows which of these methods is set for your test.
From step 8 and onwards more information will be provided about the options and buttons of the page in which you can monitor test progress.
-
Attention! It is important not to confuse the start- and end date in the planning in Remindo with the start- and end time of the test. The start- and end date is the window in which students can log into Remindo to start the test.
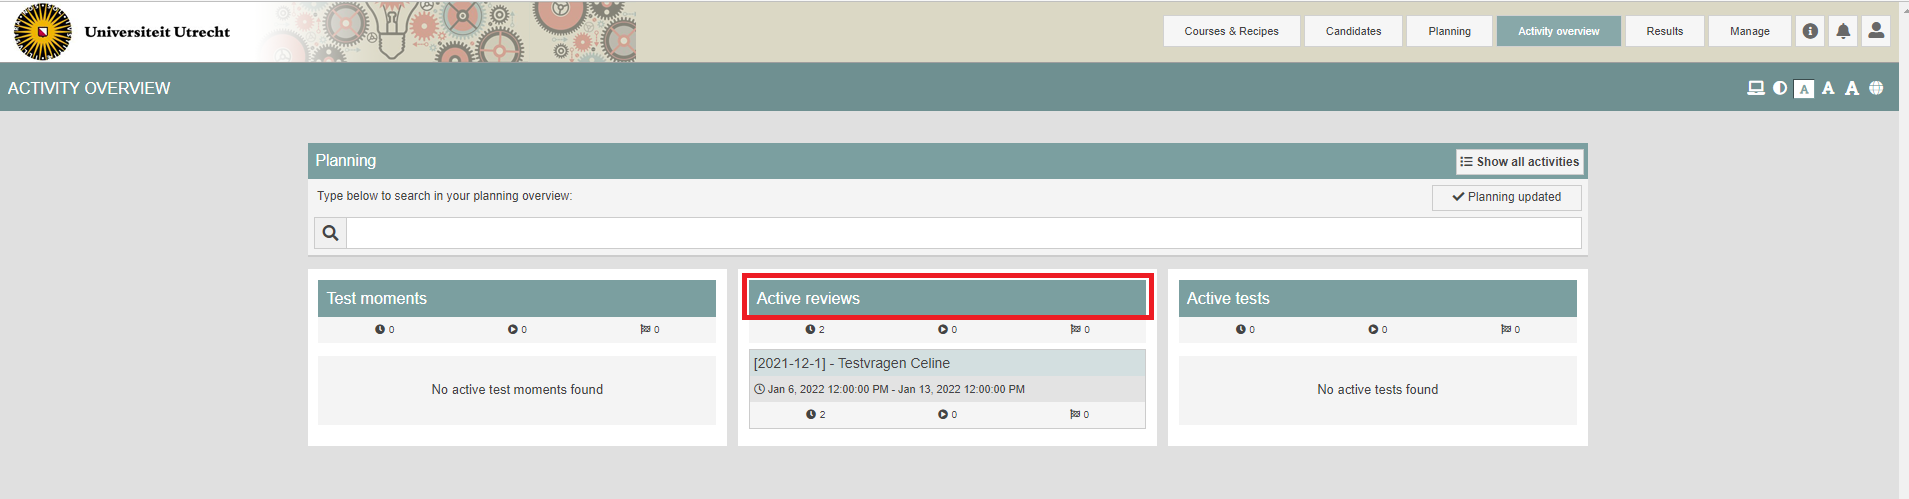
Attention! When you want to give students permission to start a review of the exam they made, you will see three columns instead of two in the Activity overview. In that case, select the test under the heading ‘Active reviews’.
-
Step 3
Instruction on how to approve students to start the test (Method 1)
Method 1 is based on the following settings of the test moment in Remindo:
- Test moment type: ‘Period’ and ‘Fixed time’
- Remaining time is calculated from: ‘Start of the individual test’ and ‘Start of the test moment’
Attention! When ‘Early Access’ is set, students are able to log in and request permission to start the test half an hour before the start of the test moment. It is also possible to approve student in that time. The student has to have clicked on ‘Request permission’ for that test. It takes other steps for the teacher to actually start the test.
When, for example, the ‘Period’ (the time period in which students can log in) is four days because it e.g. a formative assessment, giving early access is not useful.
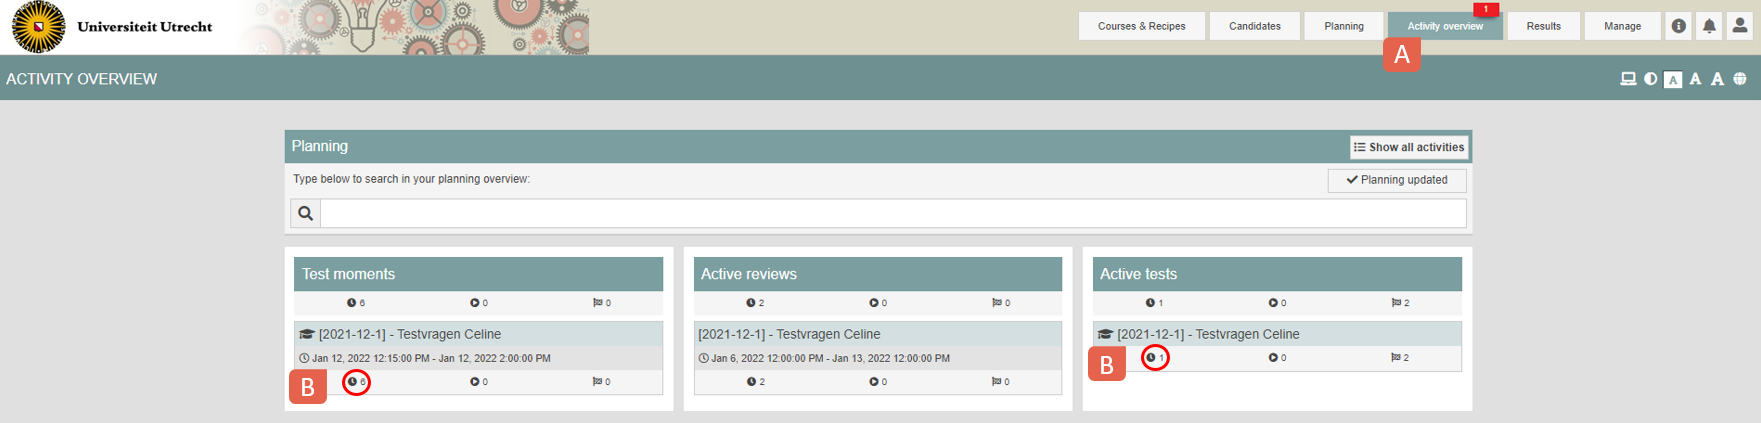
- (see screenshot below) Click on the ‘Activity overview’ button at the top of the page (screenshot, letter A) and then click on the test for which you want to give permission under ‘Test moments’ (screenshot, letter B, left). You can also give permission by navigating to ‘Active tests’ (B, right). The method offers the same functions, but is more cumbersome. We will therefore not discuss ‘Active tests’ in this instruction. We will, however, briefly explain the information circled in red: under ‘Test moments’ you see the test with the total amount of students that are enrolled and can make the test (screenshot: 5). Under ‘Active tests’ you see the same test, but with the number of students that have requested approval to start the test (screenshot: 1).
- When new requests come in, a red flag with the number of new requests will appear on the button ‘Activity overview’ (A).
-
Step 4
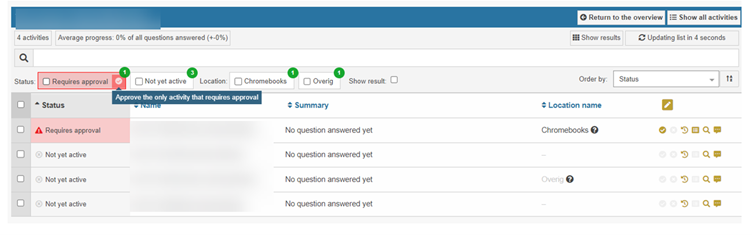
- You will find the students who have requested for permission to start the test in the activity overview
- Click on the red tick to approve multiple students to start the test simultaneously.
- The students will get the status ‘Approved’ in front of their name.
- Students are now able to start the test. Once they have started, their status will turn to ‘Active’.
Continue with step 8 if you only want to know about method 1.
-
Step 5
Instruction on how to approve students to start the test (Method 2)
Method 2 is based on the following settings of the test moment in Remindo:
- Test moment type: ‘joint start’
- Remaining time is calculated from: ‘Start of the test moment’
When ‘Early Access’ is set, students are able to log in and request permission to start the test half an hour before the start of the test moment. It is also possible to approve student in that time. The student has to have clicked on ‘Request permission’ for that test. It takes other steps for the teacher to actually start the test.
- To give permission, log into Remindo, go to the ‘Activity overview’ (screenshot, letter A) and then to ‘Test moments’ (B, left). Click on your test.

-
Attention: When you have chosen this method, it is important that you select the left field named ‘Test moments’. This ensures that you will be shown a ‘Start test’ button at the set starting time. When you select the right field (‘Active tests’), you will not be shown this button.
-
Step 6
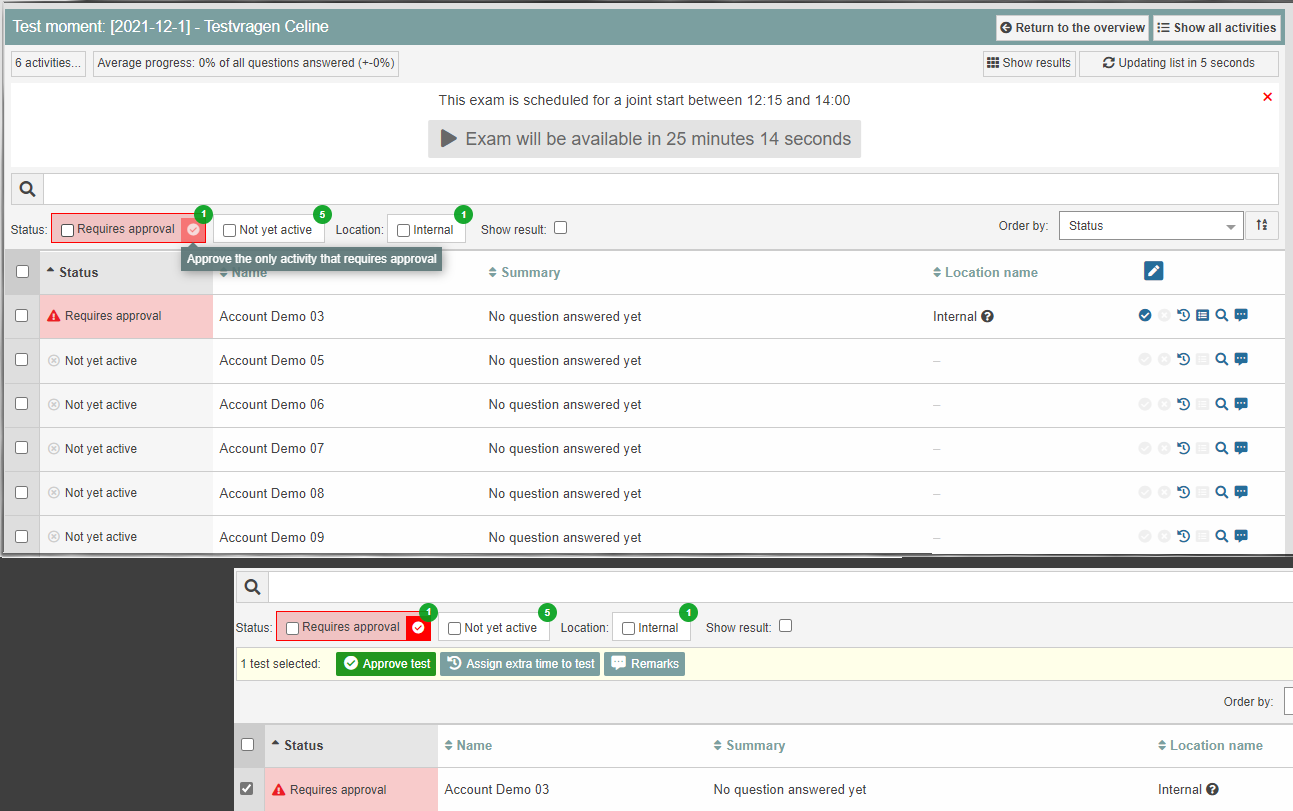
- You can give permission to students who ask for it at once by clicking on the red tick, or you can tick names individually to whom you want to give permission, after which you click on ‘approve test’ (see screenshots). The status will turn to ‘Approved’ in blue.
-
Step 7
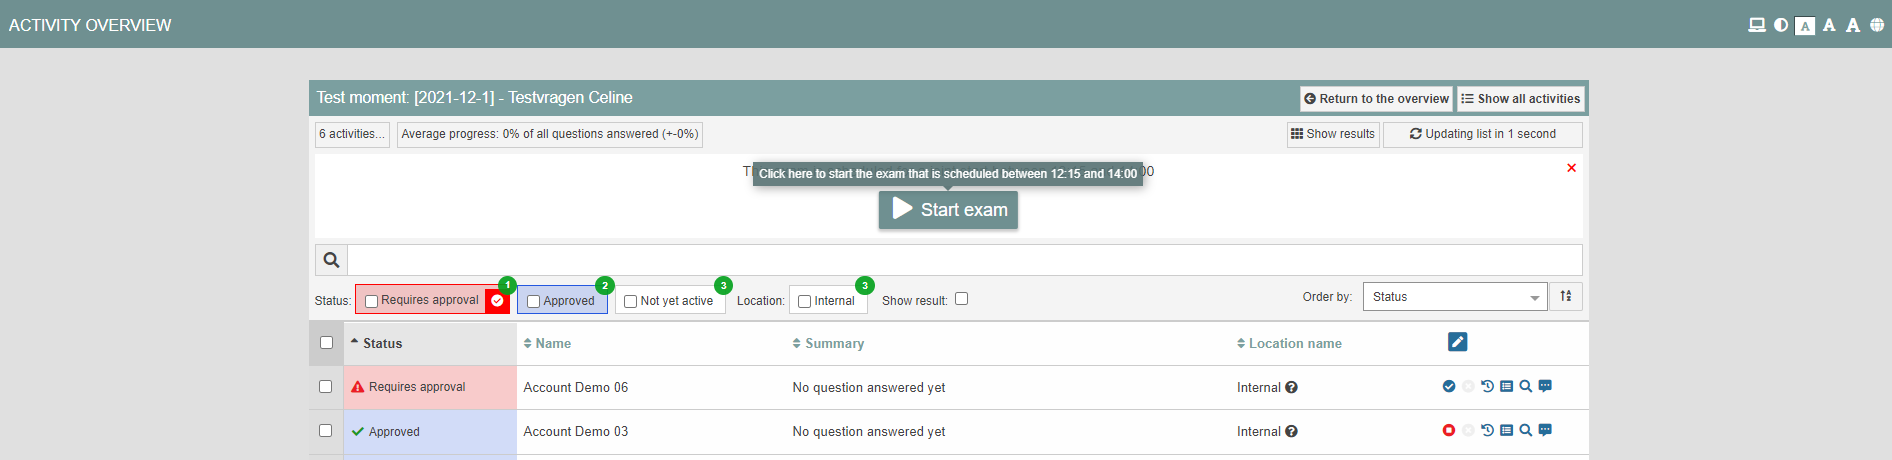
- After approving students you will see the notification ‘Exam will be available in […] min. and […] sec’, instead of the button ‘Start exam’.
- When that time has passed the button ‘Start exam’ will appear (screenshot). Click on this button for a joint start. You do not need to select students separately. Starting the test is possible for a set period.
- You will see a notification that says ‘Exam with a joint start was started at [time]’.
- The moment you press ‘Start exam’ is the official start of the test moment. Time for latecomers will be calculated from this starting time.
-
Step 8
Monitoring the status
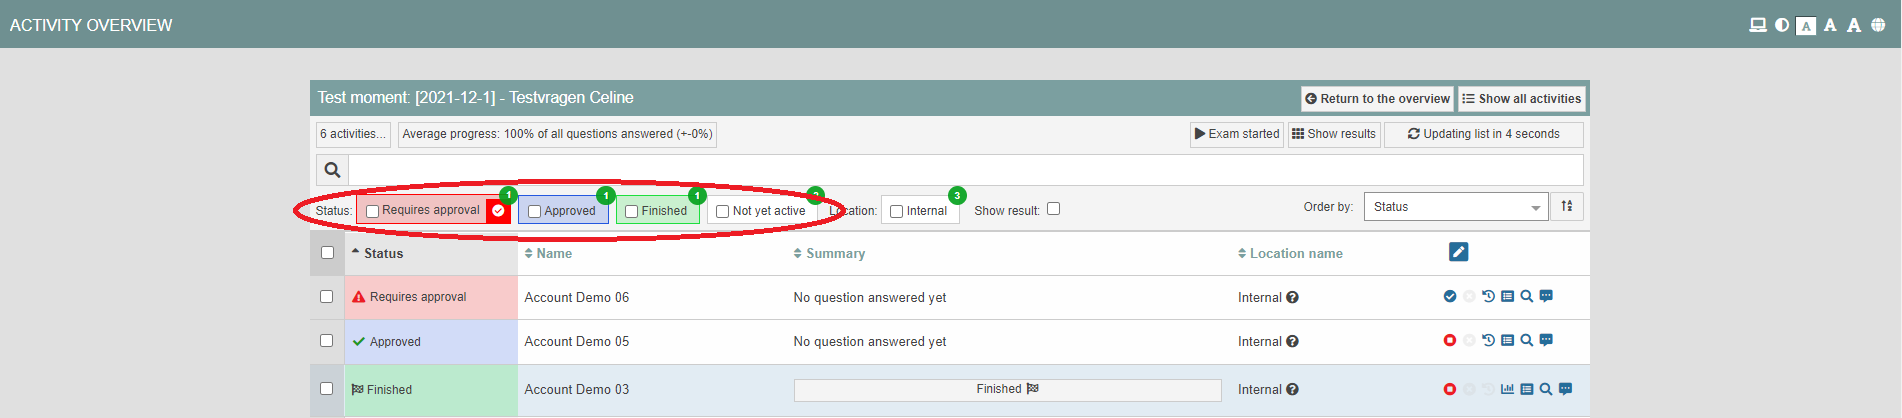
You can find students who are still waiting for permission to start the test, as well as students who have started or finished the test, in the Activity overview.
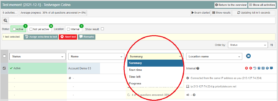
- If you only want to view the students who need permission to start the test, set the filter to ‘Requires approval’.
- If you only want to see the students who have received permission, set the filter to ‘Approved’.
- If you only want to see the students who have started the test, set the filter to ‘Active’.
- If you only want to see the students who have finished their test, set the filter to ‘Finished’.
- Other possible statuses are ‘Not yet active’ (not logged in) and ‘aborted’ (teacher has aborted the test for that student).
-
Options during the test
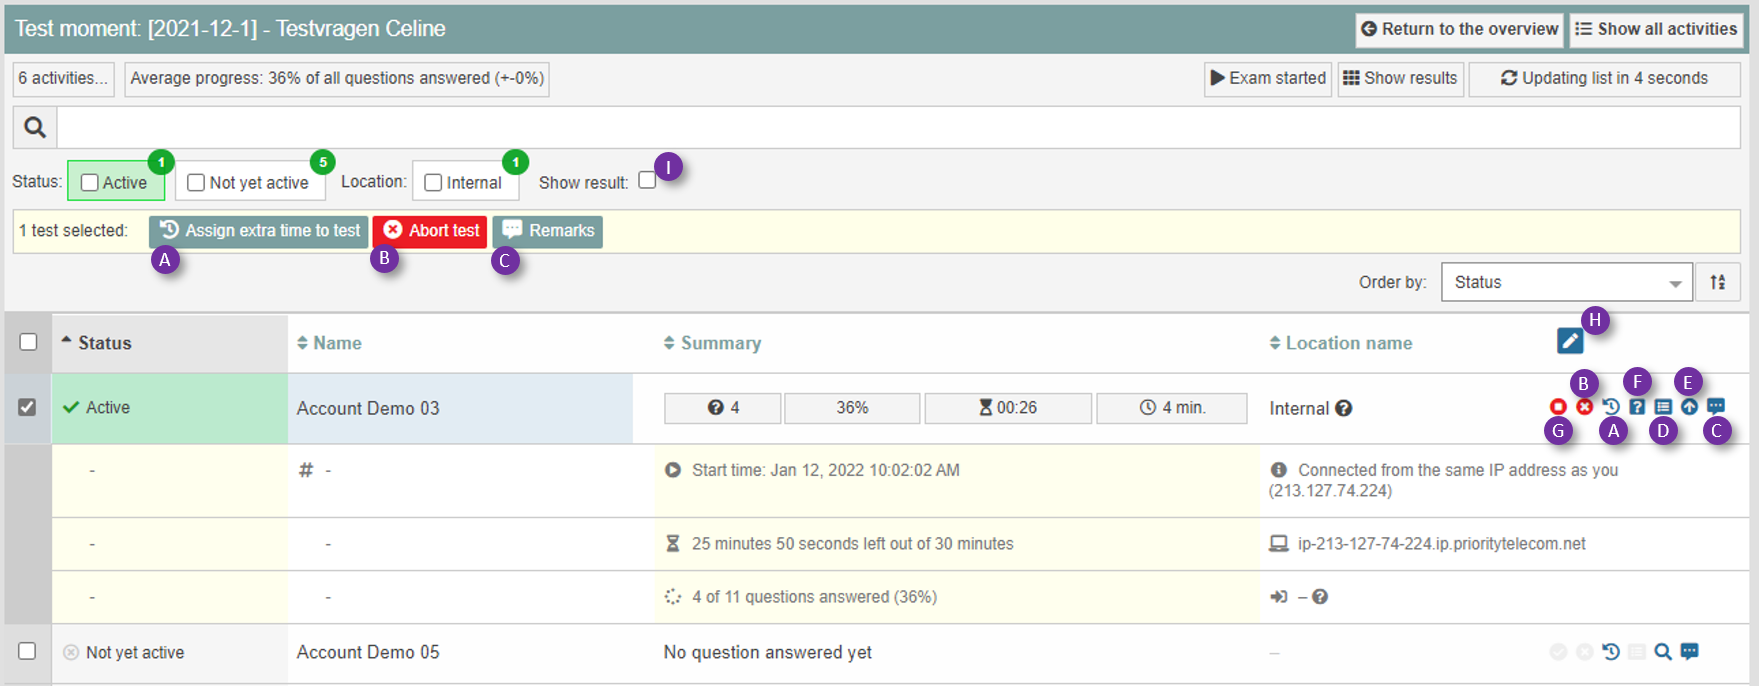
The most important buttons and symbols you can find in the activity overview will be discussed below. A short explanation on the icon will appear When you swipe over it with you cursor in Remindo. Letters in the screenshot below will be explained further on.
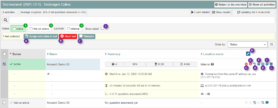
- Showing student data: it is possible to show more data per student by selecting the student or click on the magnifying glass. Deselecting or clicking on the upright arrow (E) will hide the data again.
- Withdrawing approval for the test: a supervisor can select one or more students and (temporarily) withdraw their approval for the test (‘Stop’ symbol; G). This means that students are unable to continue the test and do not see questions or are able to answer them, until they have requested and received new permission from the supervisor. The test time for these students will continue.
- Abort test (B): only click on the red ‘Abort test’ button or on the red cross when you have a valid reason to do so. A test that has been aborted/stopped cannot be started or continued again. When you click on this button you are asked if you want to ‘stop’ (no grade will be calculated) or ‘abort’ (a grade will be calculated). Also note your reason for administrative purposes.
- Assigning extra time (A): click on the dark green button ‘Assign extra time to test’ (or click on the spinning arrow/clock) to assign extra time to a student for that test. A pop-up will appear.

- Attention! When you select all students, you can assign extra time to all students at once.
- Extra time is assigned before the start of the exam is most cases. The extra time is visible as an hourglass behind the student’s name and in remaining time. When you move over the ‘+’ with your cursor you will get an indication of the time and assigned extra time.
- Remarks: when you want to write a ‘notice’ or ‘remark/incident for internal use’ for students, take the following steps:
- Notice for or remark/incident about one student: Select or click on the student. Click on ‘Remarks’ (C) behind the student’s name or at the top of the overview (the large button is visible after clicking on a candidate). Two options will appear for ‘Type’ (screenshot):
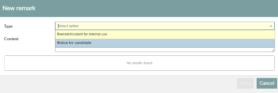
Write up the notice or remark/incident and send it.
- Notice for or remark/incident about multiple students: You can send the same notice for or remark/incident about multiple students at the same time. You select multiple students and click on ‘Remarks’ (C) at the top of the overview. Write your notice or remark/incident and send it.
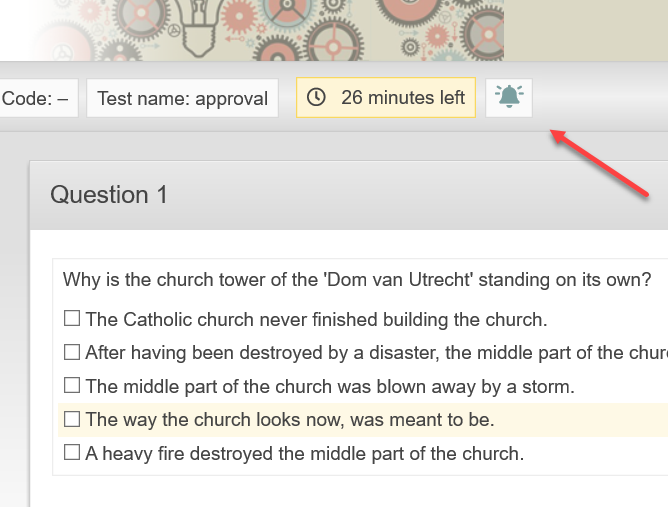
- Visibility: The student(s) will be able to see the ‘notification to the candidate’. They will see a bell in the upper bar of their test (screenshot).
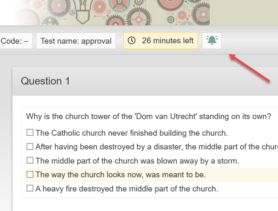
They will be able to read the announcement by clicking on the bell (screenshot). They can close it again by clicking on ‘Return to questions’.
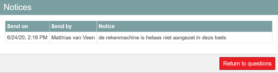
The student won’t be able to respond to it. The bell will keep blinking until the student opens it. Students will be able to open it until the end of the test. The ‘Remark/incident for internal use’ will only be visible for the teacher to read. You can recall notices or remarks/incidents by clicking ‘Remarks’ (C) behind the student’s name (you will see everything for that student) or at the top of the overview (you will see everything for every student).
- Activity log: when you open the Activity log (D) you’ll be able to see when the student has logged into Remindo, when the student has received approval, and when the students has actually started the exam.
- Seeing the progress of the student: the grey bar behind a student’s name views the progress for that student in the test.
Result of finished test: as soon as a student finishes a test that doesn’t hold any open questions, or when open questions have been checked, the score and grade for that student can be seen in the status bar by resting the cursor over a student’s status. ‘Show result’ (I) needs to be active for this function.
 Showing results: during the test analyses are available right away per question per student. Clicking on ‘Show results’ will open a new browser-tab on the Results-page ‘Learning analytics’ of this test moment (on the sub-tab ‘Details of the result’; see step 3 in this link.)

- Altering shown information in columns: with the pen-symbol (H) you are able to choose what information is to be shown in the columns.
- Show question overview or Show Results: when you click on the question mark (F) you will be able to see the activities of the selected student during the test.

- The supervisor will be able to see which question the student is answering at that moment. The text in the yellow text block is what the student is writing. The student is answering question 1, as seen by the black triangle above the grey block of question 1 (see bottom-left corner in the screenshot). By clicking on the different question numbers below it is possible to switch between questions. The triangle below the number indicates which question the supervisor is looking at.

- The options in the drop-down menu’s, which become visible when you click on the pen-like symbol (H), allow you to choose which information is shown. This doesn’t change anything within the test itself.
-
Step 9
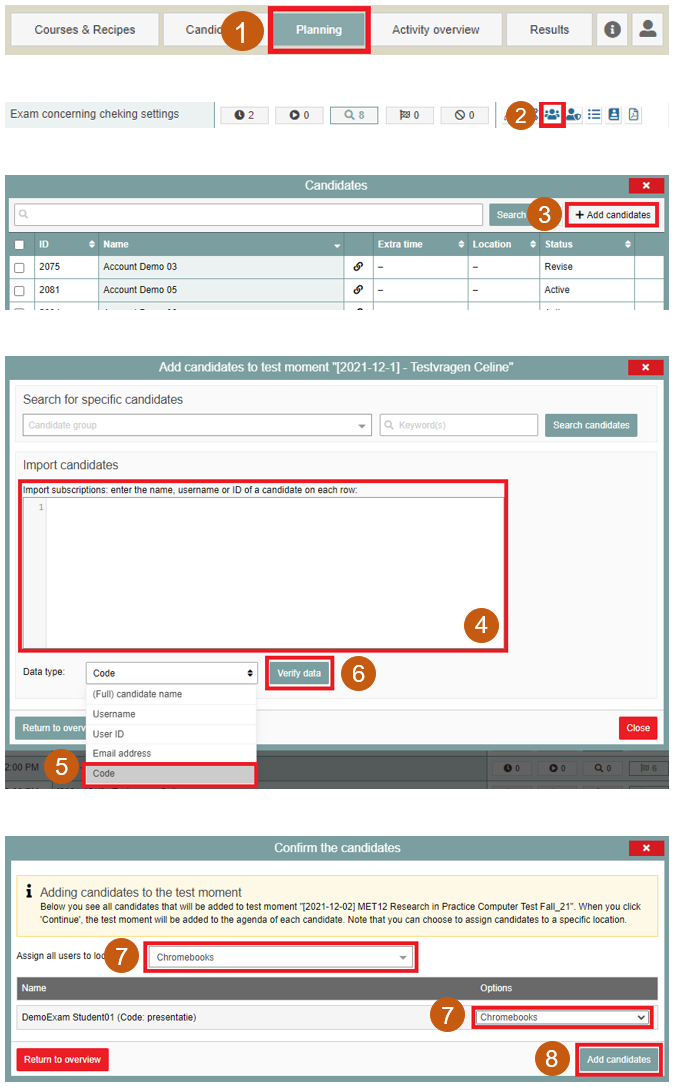
Adding a student to the test moment:
- Click on the planning-button at the top of the page. (1)
- Find the right test moment and click on the candidate icon. (2)
A pop-up will appear. - Click on + add candidates. (3)
Another pop-up will appear, in which you can search for students. - Enter the student number in the big field. You can do this for multiple students at once. In that case enter the student numbers below each other by using enter. (4)
- Select the option Code in the selection box at the bottom of the page. (5)
- Click on verify data. (6)
- A new pop-up will appear in which you need to verify the students.
Select the correct location for the students in this pop-up. (7) - Choose Chromebooks when assessment happens at the UU campus by means of Chromebooks. (7)
- Choose Thuistoetsen when the exam is made from home. (7)
- Finally, click on Add candidates. (8)
The student has been linked to the test moment.
-
Step 10
Good luck with the assessment!
If you have any questions or comments on the instructions, please contact Educate-it Digital assessment through digitaletoetsing@uu.nl