Test questions and question bank
Adding image, video and pdf files to questions
Using the edit screen, you can enrich questions with media files like images and videos. This example shows you how to add an image. You add videos and pdf files much the same way.
-
When an exam includes images, texts or any other materials that may be copyrighted, you are almost certainly required to reference your source.
Use this flowchart (source) to determine whether you can use the material in question on an exam and whether you need to reference the source if you do so (in this context, consider Remindo to be an ELO).
Referencing sources on an exam question can lead to problems, such as students using information from that source to answer the question. In such cases, you may choose not to reference the source in the question directly, but to refer to a person or place where or from whom the source is available on request.
It’s a good idea to use Open Access materials whenever possible, or materials under a Creative Commonslicence.
For more information about referencing sources, visit the UU Copyright Information Office.
-
The maximum allowed size for a media file (e.g. a video) is 500 Mb.
If you want to add a bigger media file than 500 Mb, try to compress the original file.
-
Step 1
- Log in to admin view, go to Tests and select your question.
- Start editing the question, then click the Insert media file icon in the ribbon above the text editing box.
-
Step 2
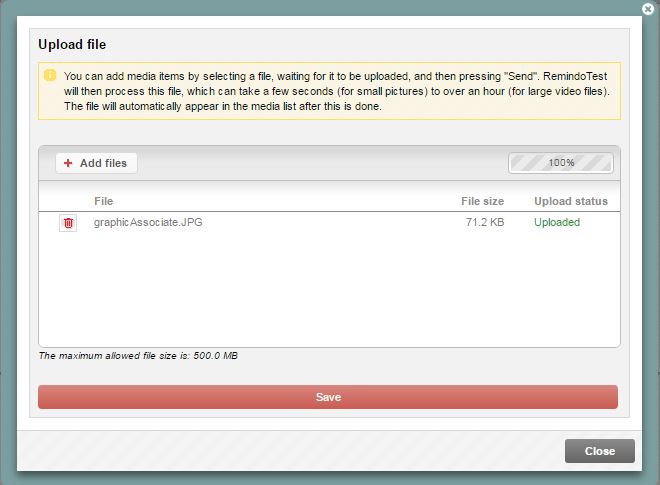
- Click Upload a new file, then +Add files to upload a media file.
- Then click Save to add the media file.
-
Don’t forget to request headphones from your key user if your exam uses sound and/or video files. These will be made available before the exam.
-
Step 3
- Select the file you uploaded from the list.
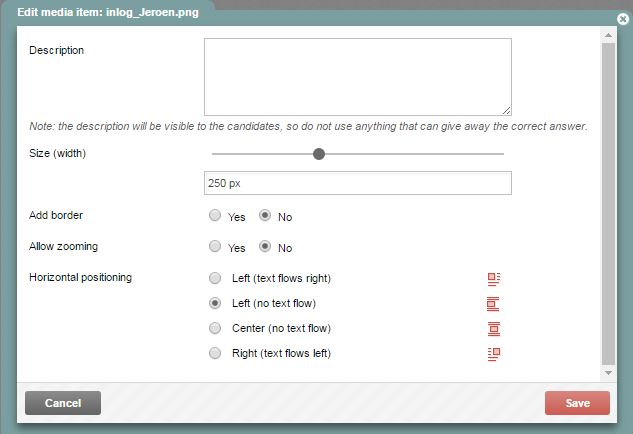
- A new screen of image settings will open.
- Enter a Description of the image into the text box. Candidates will see this text when they hover their mouse cursor over the image during the exam.
- Enlarge/reduce the image by adjusting the Size slider.
- Set Show edge to Yes to have a black edge appear around the image.
- Set Allow image zoom to Yes to allow candidates to zoom in on the image during the exam.
- Horizontal positioning allows you to determine where the text will appear.
- Click Save when you have configured all the settings.
-
Step 4
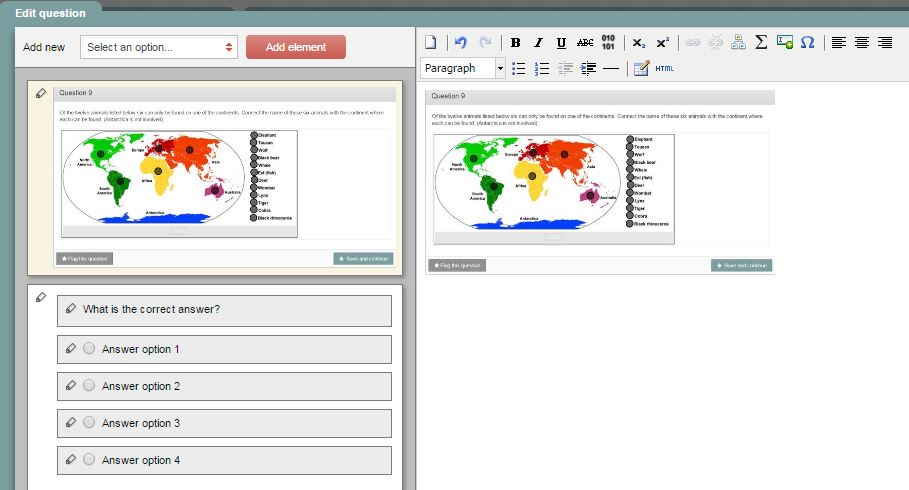
Here is what it looks like:
-
Step 5
If you want to modify the settings of an image, click on it in the text editing box to select it. Then click the Insert media file button. This will open the Settings screen so you can make changes.
Or
Right-click the image in the text editing box and select Edit media item.
-
Please note! Due to security concerns, not all types of media files (such as MS Word files) can be opened during the performance of an exam in in Remindo. PDF files, however, can be opened. Discuss the possibilities with your key user.


